 The process of producing handmade home-spun cloth is long and labor-intensive. There are many steps along the way: from choosing the right fleece to carding to spinning to weaving, etc. But while spinning or weaving is a well-known process, carding – not so much. Carding can be hard and incomprehensible for a newbie, but we’ll try to explain and show how to do it as best as we can. And the craftswoman who made the tutorial in carding wool for longdraw spinning is Lois Swales, a specialist in Medieval spinning.
Today, we’ll talk about how to make the wool rolls that are used in wool spinning, especially on the Great Wheel. These rolls are an integral part of doing well done long draw for woolen yarns.
Choosing wool
There are some key things about choosing your wool.
In the time period we’ll be talking about – upstate New York, 1st and 2nd quarter of the 1800s – many farmers were raising their own sheep, various types of sheep. It is not necessarily spinner’s flocks, it is average combined meat sheep and spinning sheep.
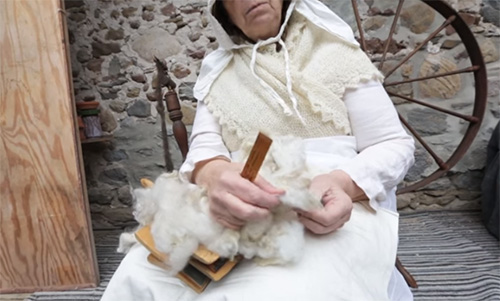
One of the key things in choosing which fleece you're going to turn into rolls is actually the length. I always check with a ruler, and when I know I'm going to do some great wheel spinning for wool, I want a fleece lock length that is perhaps 3.5 inches or less.
It is not impossible to find some that turn out shorter. If it is longer, it becomes quite unpleasant to do long draw drafting, it becomes too difficult to get half yarn to draft out in the roll form. So, once it gets up to 4 inches or 5 inches, the wool combing would be a much better choice.
Carding technique. The carders
I have selected my washed wool from a fleece and I want to card it on hand carders. There are a couple of varieties of carders: curved carders and flat carders (that depends on the shape of the backs). On the inside, there are little curved teeth, they're hooked towards the handles. And the number of teeth in a square inch does count, for it does affect the product.
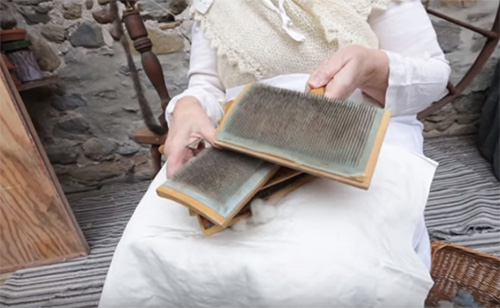
I have average sheep's wool here and I'm using antique flat-backed carders. I like these a lot, they're not so easy to find – they're on leather, so the little hooks are inserted into leather and it gives them kind of bounce.
For many years, I used Clemes & Clemes curved carders. These hooks are in some sort of rubber backing. They have exactly the same idea in that the hooks face the handles, and it's obvious they have more hooks per inch than my antique flatbacks do.
Working with flat carders
I am casually pulling out a handful of locks and I am mounting them, and I'm not very careful. I basically don't want too much wool on there. When I start, I’m working on about one-third of the way up from the bottom (a bottom is the part of the card, opposite to the handle). The second card will face the first one, they will interact in the process of carding.
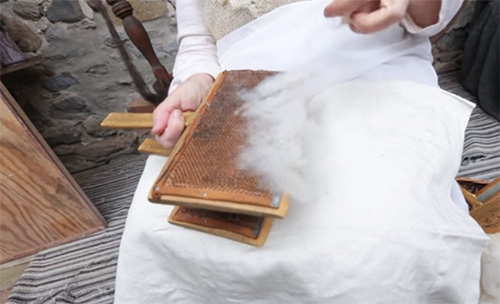
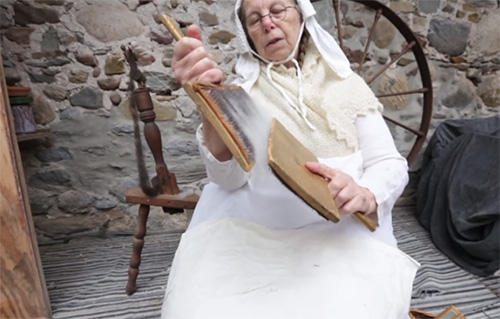
The two carders are used for carding, but remember that their teeth are not touching. They are parallel, they are starting to get closer and closer, the little teeth’s top just barely touches as it passes by. During this process, the wool is smoothing out, it's not so lumpy anymore.
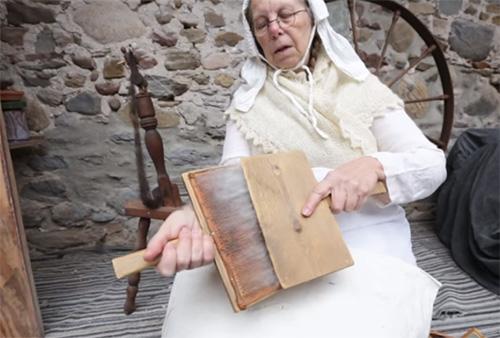
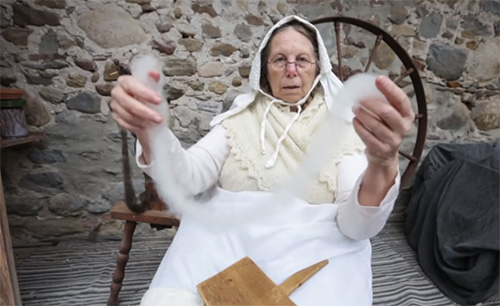
Now, the trick to moving things from one card to the next is to get the bottom near the handle and very lightly bring the bottom card up. Put it back in carding position. Very lightly and gently try to keep the wool two-thirds of the way on the card. Don’t let the wool lay close to the handle because it jumps over the hooks and makes a dense little line of spoiled wool there.
Another way, you have to kind of go back and forth. Bring the lower card up very gently. The wool may not hang on very well – that's okay.
Working with curved carders
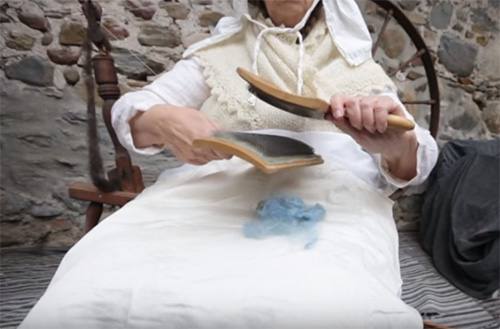
The curved carders are used in almost exactly the same way. Only the motion is slightly different because they're curved.
When carding is done
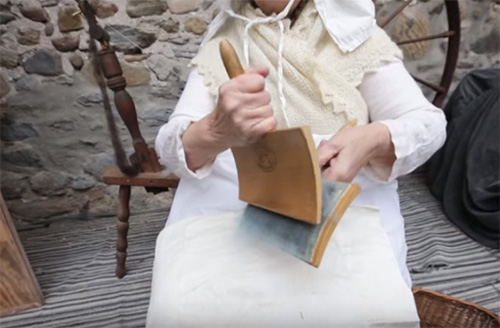
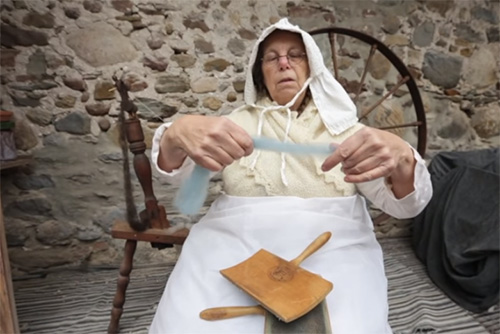
How do I know when I'm done? I'm looking for dense spots. If there are very few dense spots and everything looks very airy, it's time to take the roll off the card. When that time comes, you're going to bring the lower card up on one side, you're going to go to the top of the other car and bring it up again.
Now, they're lying very lightly. I lay my hand down and I'm making a little fold-over section. One card is going to have its teeth on that fold and your hand is going to guide the roll as you roll it off. And then, I like to compress it a little bit in the same motion, the wool roll is actually laying on the card. You must only go in one direction or this trick will not work. So, now it's nice, round, compressed, and without dense spots. In fact, if I pull on it, it pulls out pretty evenly.
I wouldn't mind having the wool roll pre-drafted a little bit longer. If you look in old pictures, they have long rolls like this.
When it’s done, take it off and form your little edge rolled over. It's kind of amazing that you can roll on the teeth but you can.
A lot of people worry about weedy stuff in the roll log. But, actually, the weeds fall out at every operation.
Shifting between different types of wool
However, we are going to talk about going from gray wool to indigo dyed blue wool.
One of the ways to clean your cards is to put them handles together and brush them against each other. This way, you can extract the old fleece from your cards, to get it out of the bottom of the teeth. Do it several times and make sure there are no old fleece pieces that can mix with your new wool roll, especially when a different color of wool is used this time. If you work a lot with colors or you work with other types of fleece or fibers, this will be important.
So, I have my indigo dyed locks and, in the same way I did before, I'm going to put some on the card. Also, there is no economy and putting too much wool on – it's best to stay light and not with a ton of wool.
When it’s time to transfer, gently wipe the card up. A transfer always has the handles kind of in the same direction, even though one might be at a 45-degree angle.
Pre-carded commercial wools
What to do if they’re neither as fluffy or as long-stapled as you had hoped?
I had some commercially prepared roving, and whenever I encounter something that I'm going to spin, I always want to know how long the fiber is. They always look good, but how long is it? The length affects how I'm going to spin it. And when I indeed tested it, this is the 3 inches or less realm of spinning.
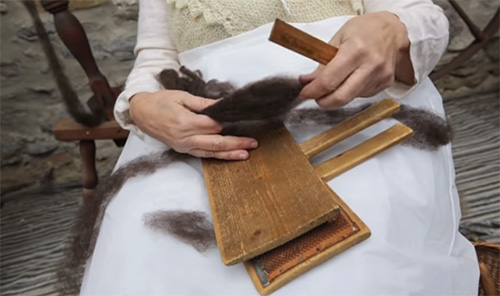
The fibers here are shorter, so it probably won't do a very good job of being spun. A lot of people would be inclined to spin it from the ends. The problem is that this is kind of dense. It's especially unpleasantly dense if you were to spin it. So, what I chose to do, since it was my ideal length for spinning wool on the Great Wheel, is I chose to re-card it into a very pleasant spinning roll by carding it again.
(c)
