 Undress costume. What a provocative name for a women’s outfit! Especially, considering that it is originated from the 18th century. In this case, “undress” is a word used to describe casual garments. It's expected that costumes of that period are elaborate but seeing all the layers and how much work went to garments that were considered casual really puts into perspective how much fashion has changed.
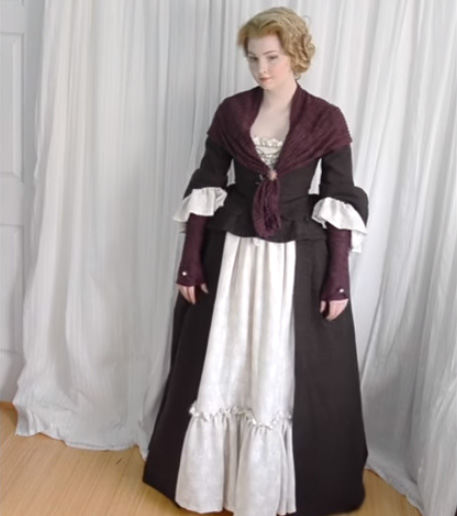
Let’s take a closer look at the costume. This attire is modern but made according to the fashion of the 18th century. The outfit is made by a young seamstress Angela Clayton.
My main inspiration in this outfit was the jacket from Janet Arnold’s Patterns of Fashion. I used materials from my stash for this project. The main fabric is a faux wool flannel with black and brass tacks on it. The front of the skirt, ruffles, and stomacher are all made from this loosely woven polyester fabric. The final material is a purple knit with an interesting scale texture to it.
But before putting on anything made from those fabrics, I had to put on the foundation garment, starting with some white stockings.

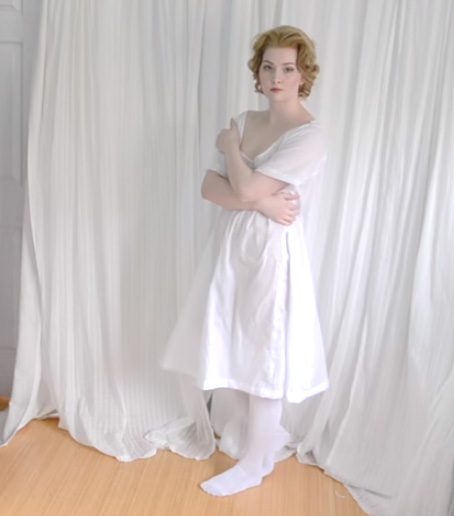
Next up is a chemise made from a lightweight cotton and sewn together with French seams.
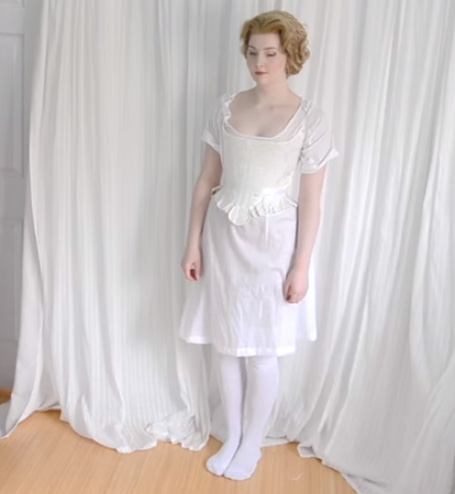
The stays are next – mine were made from a Norwalk pattern out of an old tablecloth and denim. It's boned with quarter inch plastic and has handsewn eyelids off the back. Visually, I like these stays but the fit is pretty poor – the back doesn't lace that evenly and because of that, there's excess bulk in areas where the seams were taking in.
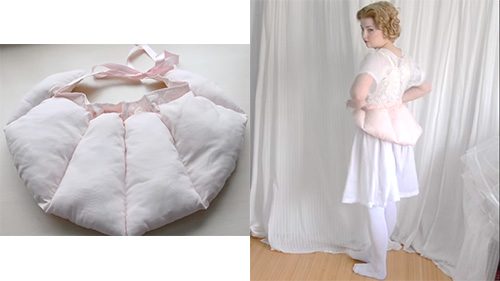
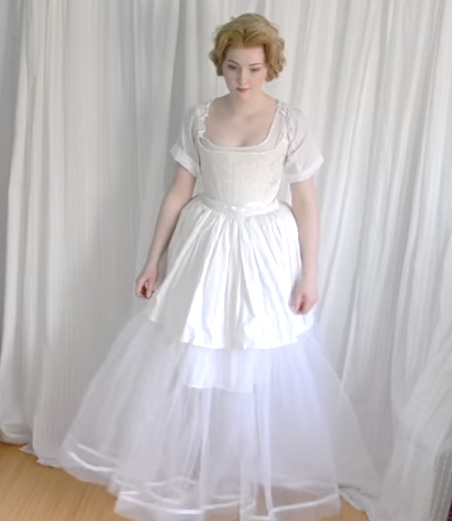
On top of that, there is a bum pad – mine is made from two layers of pink cotton that were quilted to have six sections. Then I stuffed the sections with padding until it had the shape I wanted. This helps to create a silhouette that was common in the 18th century, with the skirt having the most volume at the sides and back, with a relatively flat front.
A petticoat also helps with the shape of the skirt – it adds more volume and makes sure the skirt doesn't collapse near the hemline. I'm wearing a cotton tulle petticoat underneath this project since I find them to be more comfortable, but a quilted petticoat is more accurate.
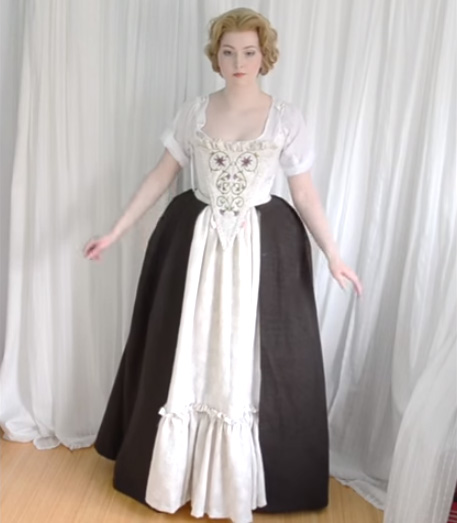
Now, the fun stuff. Starting with the skirt. This skirt has almost 7 yards of material in it, with the brown portions having a total width of 125 inches. That width was pleated down to 25 inches, so it sits nicely at the waist. The front of the skirt is made from the woven polyester material and has a ruffle near the hem – I left the top edge of this ruffle rough to add a bit more texture. The skirt was hemmed by hand to avoid physical topstitching. There was actually a lot of handwork involved in this costume for that same reason.
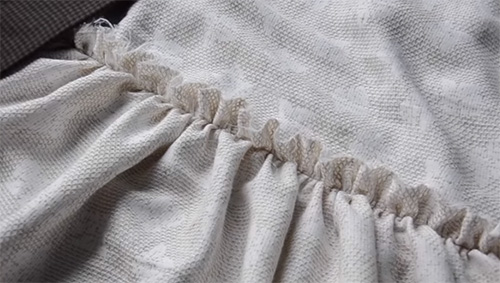
The skirt ties in place almost like an apron, with slits in the side that let me get it over my head. The first ribbon is threaded through two eyelids in the back of the skirt, then tied at the front. Then another ribbon is threaded through eyelids at the front of the skirt and tied at the back. The slits should be covered by overlapping fabric and allow you to access pockets underneath the dress if you wish to wear them.

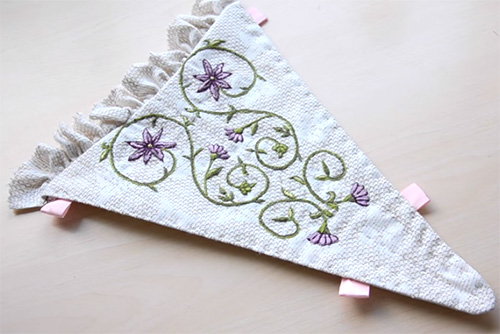
On top of that is the stomacher – this is made from the same polyester material but lined with canvas to add stiffness. It’s also lightly boned and has a ruffle across the top edge. But what makes this special is the embroidery. I drew the design myself and stitched it all by hand. It isn't the prettiest embroidery work but I'm pretty proud of it. You may also notice the ribbon tabs at the sides – these are so the stomacher can be pinned in place, either to the dress, it’s worn with, or onto the stays.
Next up is the jacket. As I said earlier, this was based on a pattern from Janet Arnold’s Patterns of Fashions, with a few changes to improve the fit. It’s lightly boned, lined with cotton, and features details like matching pocket covers and hand-stitched eyelets. The cuffs are stiffened with interfacing, lined with canvas, and decorated with an ivory ruffle. There are two pleats in the skirt of the jacket which provide enough volume for the jacket to sit smoothly over the wide skirt. The jacket goes on the way you would expect, then lacing is threaded through the eyelets and pulled until the jacket sits properly.
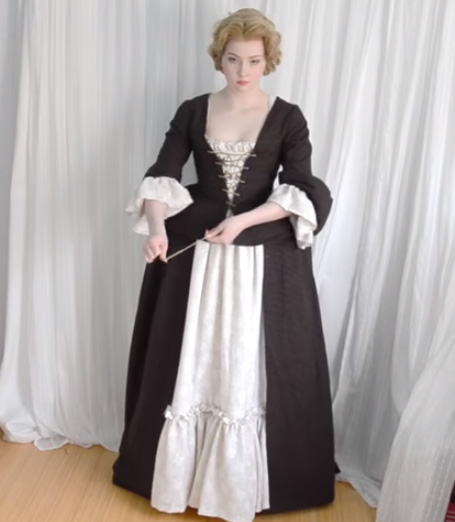
For cording, I’m using a braided gimp that has metallic bits woven into it. I like that it adds a bit of texture. After it's laced up, I go through the bottom eyelid again and tuck the excess lacing into the waistband of the skirt.
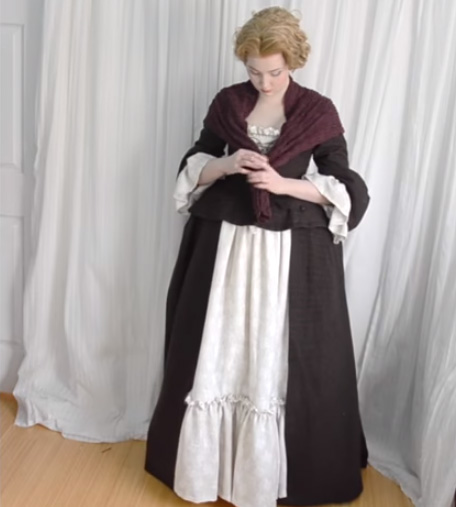
For accessories, I took some inspiration from the show “Outlander”, starting with a shawl made from the purple knit fabric. This is held in place over my shoulders with a brooch which belonged to my great-grandmother.
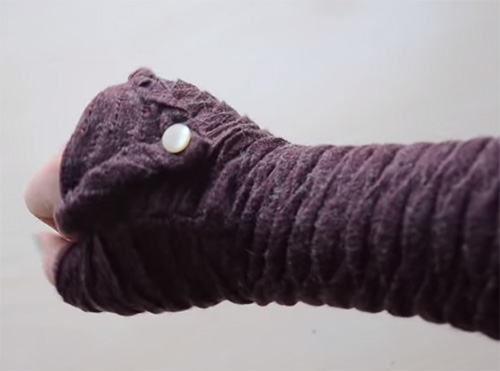
Then, there are the mitts which were a popular 18th-century accessory. These are made from the same material and based on a pattern I found online. The tips of the mitts are folded back over the hand and secured with a pearl button.
And that's it.
(c)
